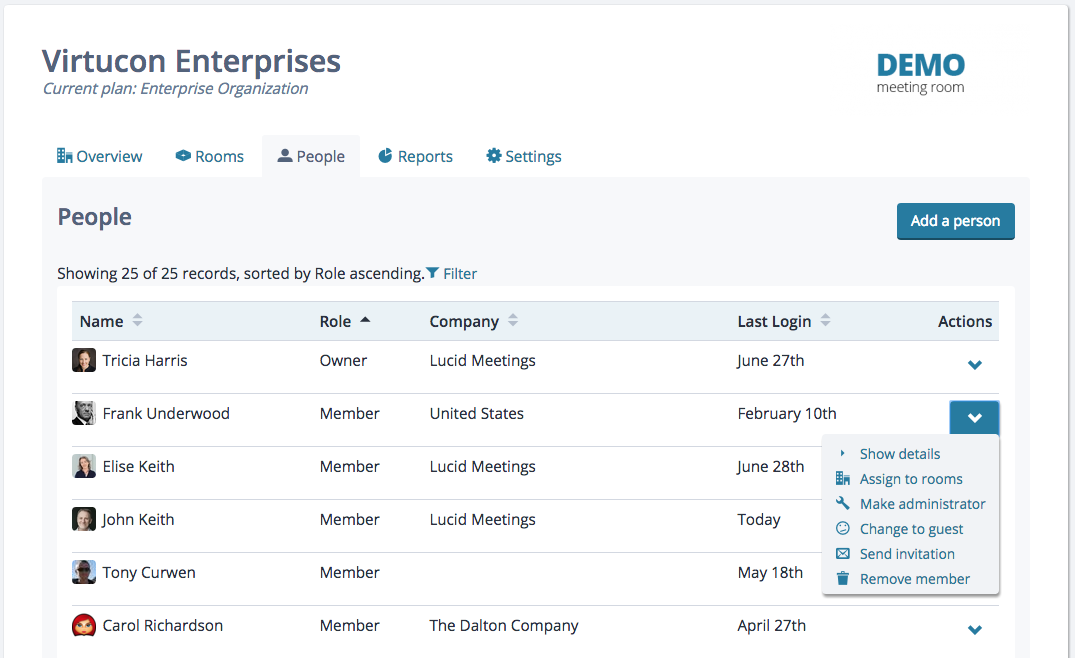
Organization owners and organization administrators can manage the people in an organization. You can view and update your organization's roster from the People tab on your organization's home page.
To navigate to the People tab:
- Select your organization's name from the navigation menu.
- Select the People tab.
Every person who has access to any room or meeting in your organization appears on the People tab, including guests.

Organization people tab, owner's view
Adding People
To add a person to your organization:
- Navigate to the People tab.
- Click the Add a person link.
- Fill in the information about the new person, including their organization role, and what room(s) they should be added to.
- Click Save.
When you add a team member or administrator, you will also be prompted to send an invitation email. We recommend this; your new team member can immediately start exploring the site and update their own profile.
You can also add guests, which simply makes them available to invite to meetings with a single click. Since guests can only view the meetings they have been invited to (and not the organization home page itself), you cannot send a guest an invitation when you add them to your organization.
Updating people
The actions menu next to a person on the People tab offers the ability to change the rooms a person is in, change their role, send them an invitation, or remove them from the organization. You can also view their profile. If the person has never logged in to Lucid Meetings, you can edit their profile — handy if you got their email address wrong when you added them!
To update a person:
- Navigate to the People tab.
- Find the person you want to update in the displayed roster.
- Click the Actions menu (button with arrow icon) for that person, and select the appropriate entry.
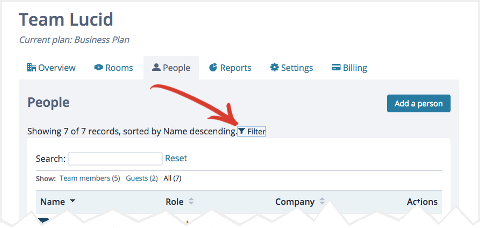
If your organization has a large number of people, you will find the Filter useful. You can search for part of a person's name, email address, or even the name of a room they belong to to filter the list. You can choose to show only guests or only members, and you can sort the list by clicking on the column headers.

Filter options on the People tab
Assign to Rooms
The Assign to rooms action displays a listing of all rooms in your organization and the selected person's role (if any) in each room. To change a person's room membership or role, select the appropriate entry from the Change Role select menu for each room, then click Save.
Change a Person's Role
Use the Actions menu to select one of the following options to change a person's role:
- Make administrator (shown for members only)
- Change to guest (shown for members only)
- Change to member (shown for guests only)
- Remove administrator role (shown for administrators only)
Note that you cannot change an owner's role on this page. Only the organization owner can do this, and they must do so by specifying a new owner.
To change the organization's owner:
- Navigate to the organization, and select the Settings tab.
- Click the Edit information link.
- Under Organization Administration, select a new person to be the owner, then click Save.
Sending an Invitation
Sending an invitation is an easy way to remind someone how to log in. Invitations include a "one-time login" link similar to what a user would get by choosing Get a new password from the sign-in page.
To send an invitation
- Navigate to your organization's People tab.
- Find the person you want to invite.
- Click the Actions menu (button with arrow icon) for that person, and select Send Invitation.
Removing a person
To remove a person from your organization:
- Navigate to your organization's People tab.
- Find the person you want to remove.
- Click the Actions menu (button with arrow icon) for that person, and select Remove member (or Remove guest).
Removing a person from the organization removes them from all rooms and future meetings in the organization, and un-assigns any open action items that were assigned to them. Meetings the person has already attended will retain a record of their name and attendance.
